Thursday 27 June 2013

First Anniversary Cascade Card's Box


Well, not wanting the cascade card I had made to get damaged, I decided to make a box for it. I wanted to create something that hinted at what was within but was different enough to be a design in it's own right too rather than just an addition to it.  I also realised that I would have to make the box deep enough for a card which whilst it could 'squash' flat if going into an envelope, would be inclined to pop up a little if not restrained, if you know what I mean.

Loads of layers on the flowers alone.
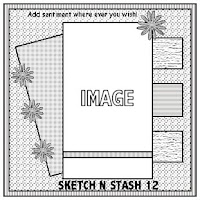
I decided to use the lovely sketch at 'The Sweet Stop' this week (though set it at an angle so I hope that is permissible) & for the image I went not with the identical Precious Moments' image of the card but one with a couple hugging instead.  The image was coloured with Promarkers, again reflecting the colours of the card & those on the wedding day itself which hopefully my niece & her husband will appreciate.  This loving Precious Moments couple are stood above complementary layers (as per the sketch) to those on the card - either similarly embossed, with cut fretwork or with oodles of matching flowers for a dimensional border.  Embellishment using the same multi-layered floral spray from Miss Kate Cuttables & again cut using a combination of plain & pearlescent cardstock, helps to tie it back to the card but I then added a final singular flower to the empty corner provided when I set the main panel at an angle. I know this is a little astray from the sketch alone - but thought that in the case of this wider area to fill, it helped with the overall design so I hope the ladies at The Sweet Stop don't mind. One further addition is that of the Anniversary sentiment to give the keepsake box some identity. (I do hope these creations are keepsakes & not just confined to the bin after a week or so - you can't be sure can you - & only we crafters appreciate how much time goes into our projects).  As I would expect the box to get a bit more wear & tear than the card - (well, hopefully the card won't get played about with too much!!!!) - then rather than adding finishing touches of sticky-backed pearls & gems as I had popped onto the card, I dotted the floral centres with Cosmic Shimmer pearl glue.


I then created a box liner printed with inspirational & meaningful sentiments I hope the couple will appreciate as I wish them all the best on their continued journey through life together. To finish that off, I popped on single layer flowers not wanting too much dimension on the inside but couldn't resist prettifying the inside a bit, again adding Cosmic Shimmer centres.


Thanks for visiting my blog and a thank you to those taking the time to leave a comment too.

Tine :)

Challenges I would like to enter this box for are:

The Sweet Stop - design sketch
{Pin}spirational - image inspirations - colours
Hobycutz - anything beginning with 'H' (hugs)
Passion for Promarkers - name that tune (Hug & Squeeze Me - Lynsey de Paul)
Stamping Sensations - summer blooms
Stamp with Fun - celebrate
Whoopsi Daisy - 3-d
Country View - die-cuts (Silhouette Cameo digi cutter)
Scrappers Delight - either punch, die-cut or cut-file
Incy Wincy - tic tac toe (vertical centre - no pattern paper, emboss it, flowers)
Heck of a Challenge - tic tac toe (diagonally - pearls, die-cut /punches, flowers)
Pan Pastel - lots of layers (even the leaf die-cuts alone are made from 3 layers!)
{PIN}spirational image
Love to Scrap - anything but a card
Crazy - anything but a card
Inky Chicks - anything goes
Word Art Wednesdays - anything goes
Through The Craftroom Door - anything goes
Challenges 4 Everybody - anything goes.


Sunday 23 June 2013

Buzzin' By To Say Hi!


I have used the lovely sketch currently over at Sketch & Stash for this summery birthday card for a young girl.  The cut-files are perhaps arguably less evident in this one - but my Cameo has indeed seen some use, most notably in the sentiment panels on the front but also to create my shining sun. I also used a digitised version of the image so that I could perform a print & cut with the Cameo for a precise cut around the image's hand. Silhouette users just might also spot that I added a lilac 'sewing line' via the Silhouette software to the floral paper.

Once all printed off, I coloured the image with Promarkers and added Anita's Clear 3-d Gloss to the 3 'brads' made from card & also to the centre of my radiant sunshine. Not used this gloss in ages but I hope it has given a nice extra element to the overall effect. I think my photography skills leave a lot to be desired as the yellow 'brad' is actually the same colour as the sun but the reflection off the glossy finish is making it more of an orangey-yellow than it is in real life - & yet the gloss on the sun isn't really showing at all!!!! LOL.  The image's mat, along with the 3 sentiment mats & 3 brads were all mounted using either foam pads/ glue gel or even both to give that bit of dimension.

The 'Bee happy' was cut but the rest of the inside's sentiment printed.

Of course, I decorated the inside of the card too using the same papers as those on the front & added yet another cut-work sentiment (Bee Happy pun) to the central panel so the background colour would peep through & I gave the top corner the same cut-work sun (again with a glossy centre) as on the front of the card to help unify the design.


Tine :)

Challenges I wish to enter are:

Sketch & Stash - design sketch (old items from stash - 3-d Gloss & striped twine, new stash - digital papers)
My Craft Spot - as cute as a bug
Tammy's Scrappin' Corner - anything with wings
Victorine - in the garden with bugs/animals
Craft-Room - here comes summer
Deep Ocean - welcome summer
Stamp & Create - summer fun
Crafty Sentiments - fun in the sun
Ribbon Carousel - fun in the sun (plus spooled item - twine)
Whoopsie Daisy - fun in the sun/summer
Aud Sentiments - summer
Creative Corner - summertime
Delicious Doodles - stitching (real or faux)
Artistic Inspirations - ribbon or twine
Silhouette Challenge - print & cut ( papers/ image/ sentiments)
Country View - die cuts (Silhouette Cameo digital cutter)
Emerald Faerie - punches/dies (Silhouette Cameo digital cutter)
Cupboard Trilogy - birthday
My Sheri Crafts - birthday
Sweet Stampin' - cute & cuddly (isn't she just?!!?)
I ♥ Promarkers - anything goes
Pollycraft - anything goes
There She Goes - anything goes.

Friday 21 June 2013

First Anniversary Cascade Card


This one is something of a sequel.  Not sure if anyone remembers my Wedding Tryptic card & matching  box for the 'main event' last year but I have combined a couple of elements from the wedding card for my niece & hubby for the one now celebrating their first anniversary together. The main element of which is the lattice-work & bells which I have incorporated into another shaped card, this one being a 'cascade fold'.

To do this, I first created my own cut-file for a cascade card, combining a larger 'back-plate' to add extra interest not only to the front view in the form of the 'heart-arch' shape but also to give me extra room to add an image. (Any excuse to colour!!!)  To this I then added my own bells/lattice design into the front panels. I kept the colour-way used for the wedding (blue bridesmaids dresses) adding embossed mats for the larger 'cascades' though not for the smallest so that the fretwork design would show up better. I also added the couples initials into a central heart.


To the largest cascade elements, I also added floral embellishments & these multi-layered flowers are from 'Miss Kate Cuttables' (flowers with vine) & when I say multi-layers I mean loads of layers!!!! 3 for the leaves alone not to mention the flowers!!!! Like the rest of the card, the white on white flowers were cut from a combination of plain & different pearlescent card before being topped off with pearls & a few matching blue gems.
Lots & lots of layers for dual-side flowers.

On the reverse of the middle cascade I have added a sentiment to one side & the handwritten 'from' on the other.


The back-plate - again embellished with pearls - features a Precious Moments image coloured with Promarkers. Two more mirrored sets of floral bouquets (glued to the ones behind make then very sturdy), help frame the image too I think.


Hope you like it & thanks for visiting my blog!

Tine :)


Challenges I would like to enter this card for:

Passion for Promarkers - at least 5 flowers (14 actually, LOL - 3 on each bouquet plus 2 individual ones with leaves on the embossed mats)
Quirky Crafts - more than one fold
Wags 'n' Whiskers - wedding/anniversary/love
Inky Chicks - love
Bearly Mine - flowers galore
Little Red Wagon - no pattern paper
LEJ Designs - add some texture (embossed panels)
Whimsy - shaped cards
Country View - die cuts (Silhouette Cameo digital cutter)
Paper Makeup - punches/dies (Silhouette Cameo digital cutter) plus digital image
Emerald Faerie - punches/dies (Silhouette Cameo digital cutter)
Southern Girls - punches/dies (Silhouette Cameo digital cutter)
Word Art Wednesdays - anything goes (with inspirational quote)
Crafty Catz - pick 'n' mix (anything goes with optional extra embossing)
There She Goes - anything goes
I ♥ Promarkers - anything goes
Stamping for the Weekend - anything goes
Stamping with the Dragon - anything goes
Pollycraft - anything goes.

Wednesday 12 June 2013

CAS - On Father's Day


Yes, trying my hand at a CAS card again this week & this one is for my FIL. Being CAS, there really isn't too much to tell you about this one! LOL. Any cutting was done using my Cameo & this includes my paper-pieced chair & cushion. This basically means that the chair was a print & cut comprising of 3 layers & making the Cameo cut around the edges for me would give me a more accurate finish than me with my Fiskars' or a craft-knife I am sure. All colouring was done using Promarkers. The bunting was also print & cut with coordinating digi papers. The twine hopefully gives it a more masculine touch too.


Not sure you would even be entirely interested in the insert as I have kept this very, very simple with a sentiment is from Creative Cottage. Well, I couldn't do a fancy insert for a CAS card, could I? LOL.

Thanks for visiting.

Tine :)

Challenges I wish to enter are:
Silhouette Challenges - print & cut
Cuttin' & Stampin' - father's day
Glitter n Sparkle - father's day
Anything Goes - father's day
Going Grey With Scrap-Creations - father's day
Crafty Sentiments - card for a male
Tip Top - masculine
Craft Your Passion - father's day/masculine
Lexi's - father's day/special male birthday
Tammy's Scrappin' Corner - manly/father's day
Pink Elephant - father's day
Hobby Cutz - father's day
Simpy Create Too - father's day
Wags 'n' Whiskers - father's day
Stamping Chef - for dad
Crafting For All Seasons - one for the guys
Creative Belli - father's day (old stash used - twine)
Sisterhood of Crafters - Men/boy.

Sunday 2 June 2013

Sitting Tilda


The card I am sharing with you all today uses a 'Bon Voyage' Tilda & I have her sat on a birthday card full of layers - most of which are distressed in some way. There is a LOT of texture on this one - from the Forever Friends embossing folder, paper-piercing, torn edges & distressed edges, not to mention that even the white card layer behind the pink cut-work layer is textured too. This might not show too well in the photo but it peeks through the cut-work nicely in RL. Tilda herself has been coloured using Promarkers & a couple of Tria pens but I have added a hint of colour to my card-stock with pink chalk (not used those chalks in ages!) as well as a pale blue ink pad.

Yes, this another of my cards brimming with cut-files created using my Silhouette Cameo and a number of the resulting layers are also given that touch of dimension courtesy of glue gel. I created all the cut-files other than the pink floral background immediately behind Tilda & this is a cut-down version of a design from 'Designs on Cloud 9'. The circular sentiment in the middle of my doily-like floral circles is from Sentiments4You.


I kept the inside of my card a lot less complex but still used some of my matching cut-files here too.


Hope you like it - & thanks for visiting my blog!

Tine :)

Challenges:
Crafting with Dragonflies - one for the girls
Allsorts - for the girls
Crafts & Me - shabby chic
Lovely Hanglar or Sweet Magnolia - shabby chic or vintage
Magnolia Down Under - bling it
Creative Belli - flowers (flat ones)
Hobbycutz - flowers
Marvelous Magnolia - summer fun (flowers upon flowers)
Midweek Magnolias - make it sparkle (gems)
Great Impressions - leave a  little sparkle
Tilda Town - let's celebrate
Opus Gluei - birthdays
Creative Moments - lots of layers
Corrosive - I've been framed
Glitter 'n' Sparkle - b is for..... birthday, bling & blossom
Paper Pretties - embossing
Southern Girls - tic tac toe (gems/ distressing & ink / spots)
Crazy - use a sentiment
Craft-Room - use your scraps (not the main card but all the other layers were 'scrap' pieces)
Silhouette Challenge - print & cut (sentiments were both done as print & cut & I digitised Tilda so that I could cut her out using the Cameo too)
Use It Tuesday - anything goes using something 'old' (my chalk)
Bugaboo - anything goes
Whimsy - anything goes
ABC - O = open (anything goes)
Totally Papercrafts - anything goes.